

User Manual – How to Validate E-Invoice
JEMiSysPOS - Sales
- Enter VIP No. in Sales Invoice Entry
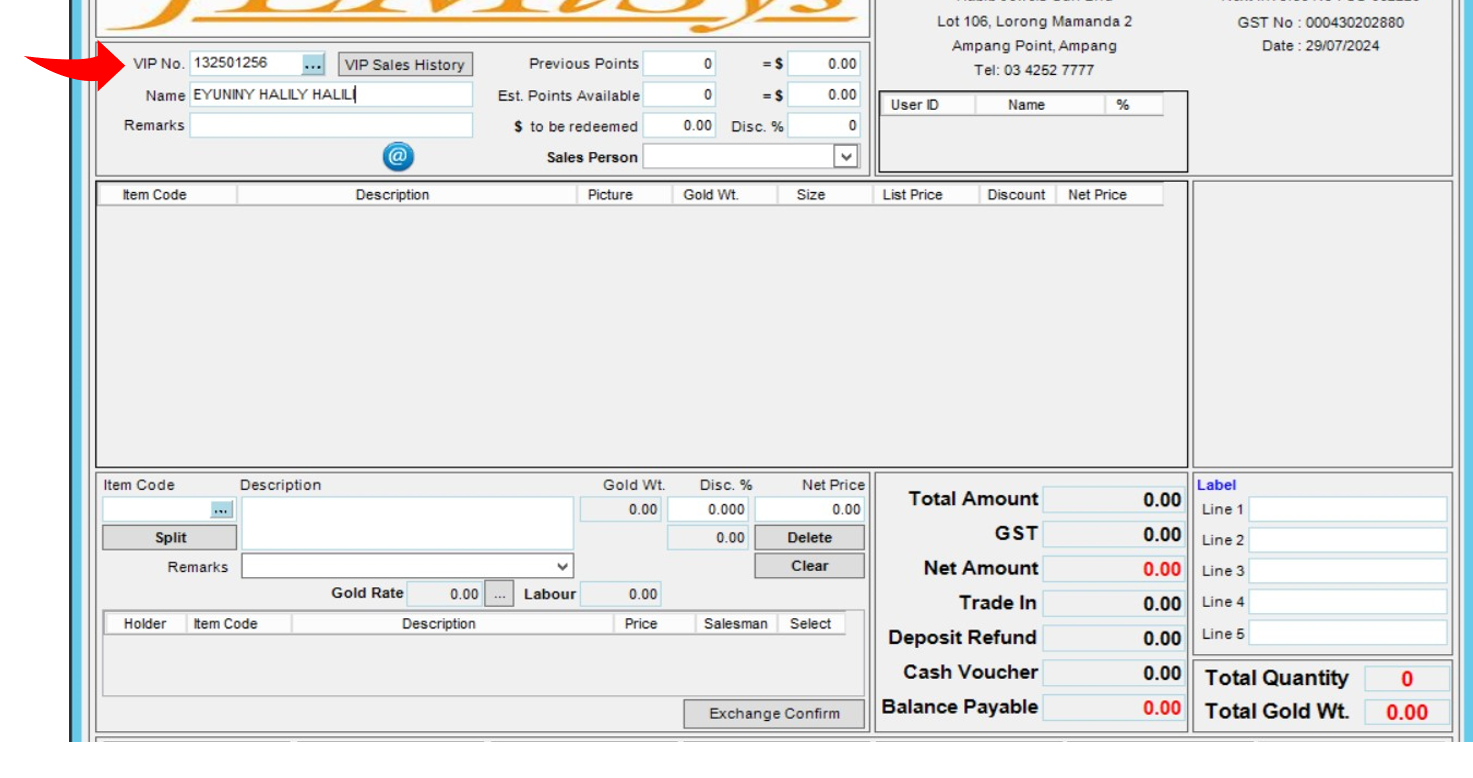
2. Issue and tender sales as usual

3.Go to Transactions tab on top of the Sales Invoice Entry

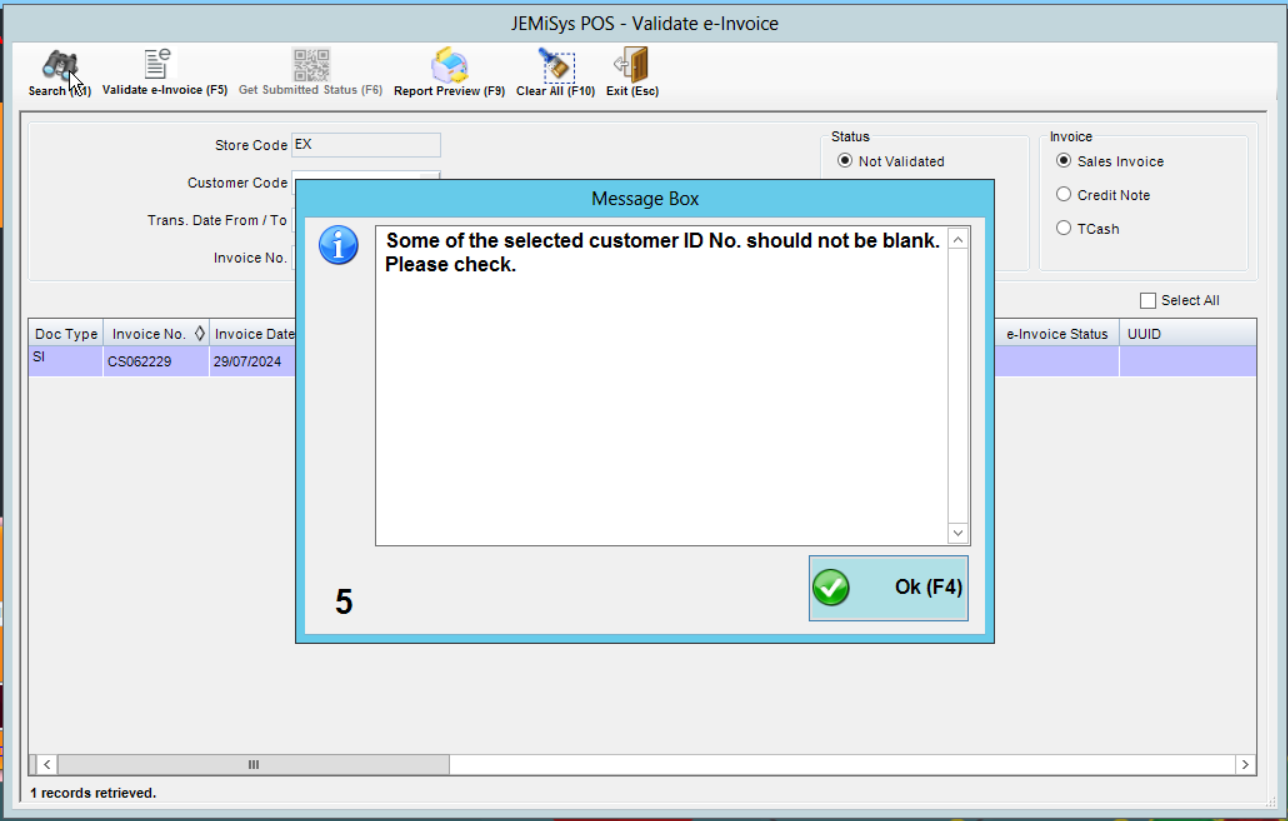
4.In JEMiSysPOS – Validate e-invoice screen, user may search the specific Invoice No. or by Transaction Date or Customer Code/VIP No. under Status – Not Validated

5.Tick Select box and click Validate e-Invoice button.

6.System will prompt message box if the customer information (compulsory fields from LHDN) are blank.
7.Click Customer button under Show column

8.It will go to Member profile screen
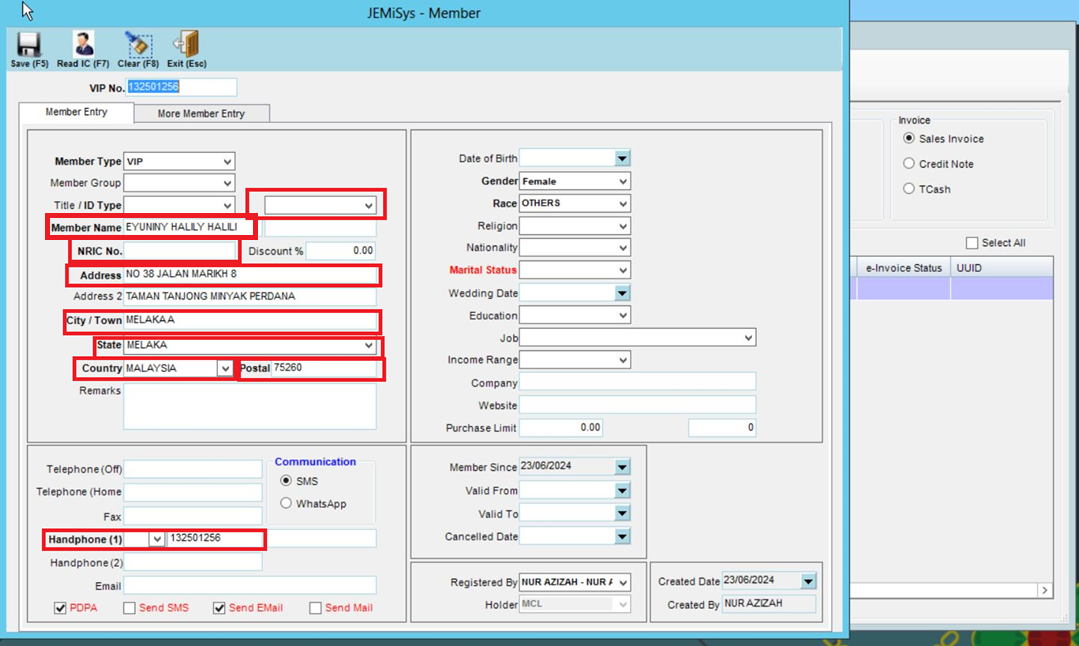

Compulsory fields required by LHDN as below :
| 6. State |
| 7. Country |
| 8. Postal Code |
| 9. Handphone (1) |
| 10. Tax Identification Number (TIN No.)
|
*In the event customer do not provide the TIN No, user can put General Public TIN No. (EI00000000010) for Malaysian citizen, (EI0000000020) for Foreigner
9.Complete all the required information and Click Save.

10. Re-do steps no. 4 and 5 to validate the e-Invoice on Validate e-Invoice screen
Step 4 – Search the invoice no.

Step 5 - Tick on Select box and click Validate e-Invoice

11.A message box prompted for confirmation to proceed validate e-Invoice or not will appear. Click Yes to proceed.

12.Once confirmed, system will prompt message of e-Invoice has been successfully submitted and provided with UUID from LHDN.
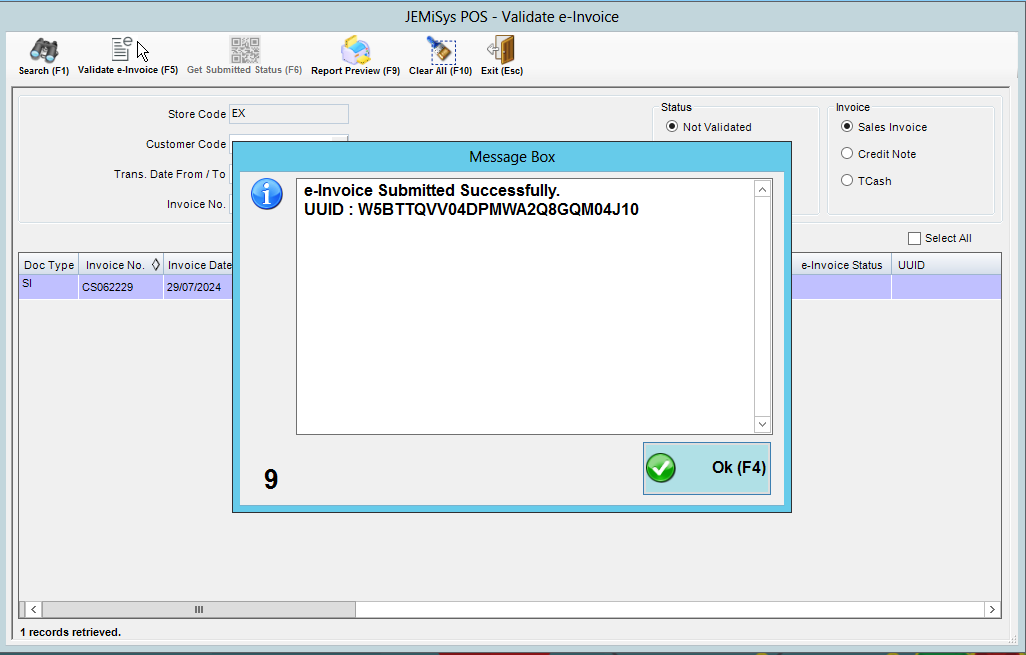
13.Click OK button and the invoice no. will automatically falls under Submitted status
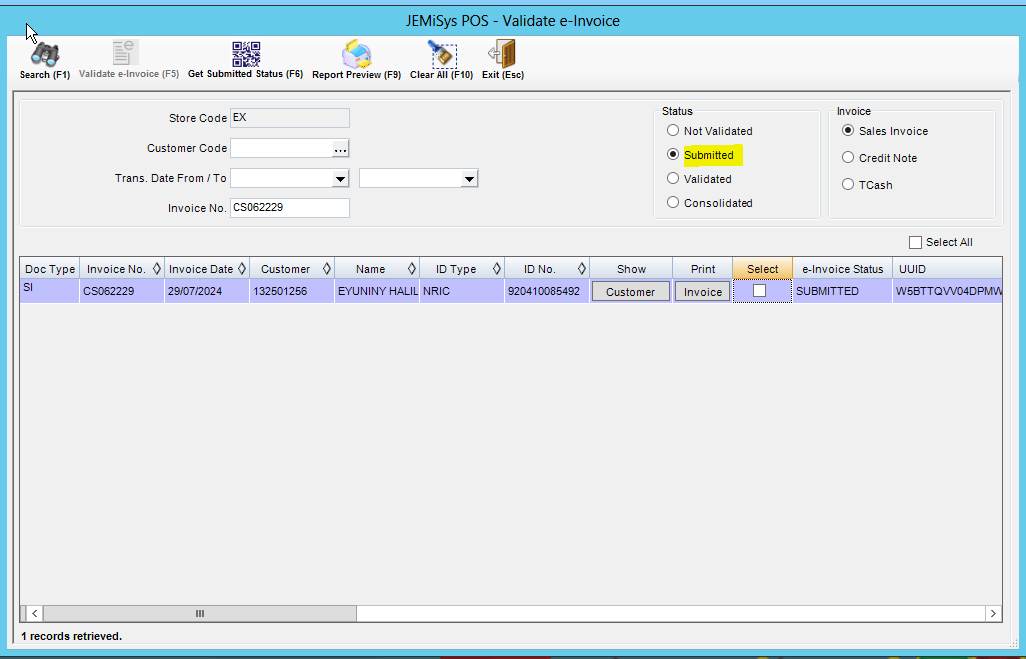
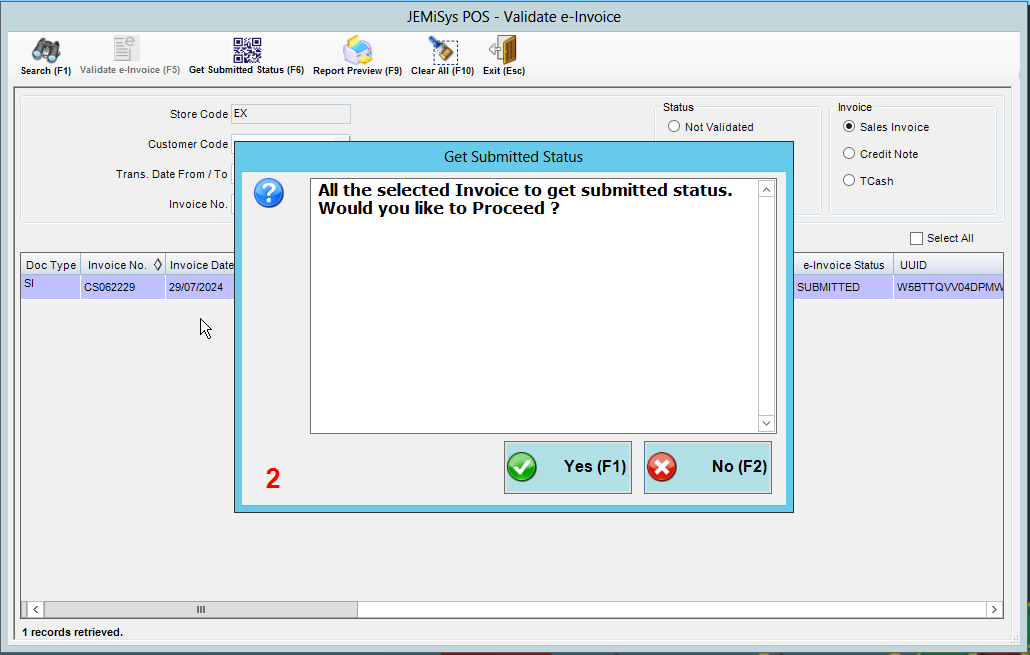
14.Tick on Select box and click Get Submitted Status
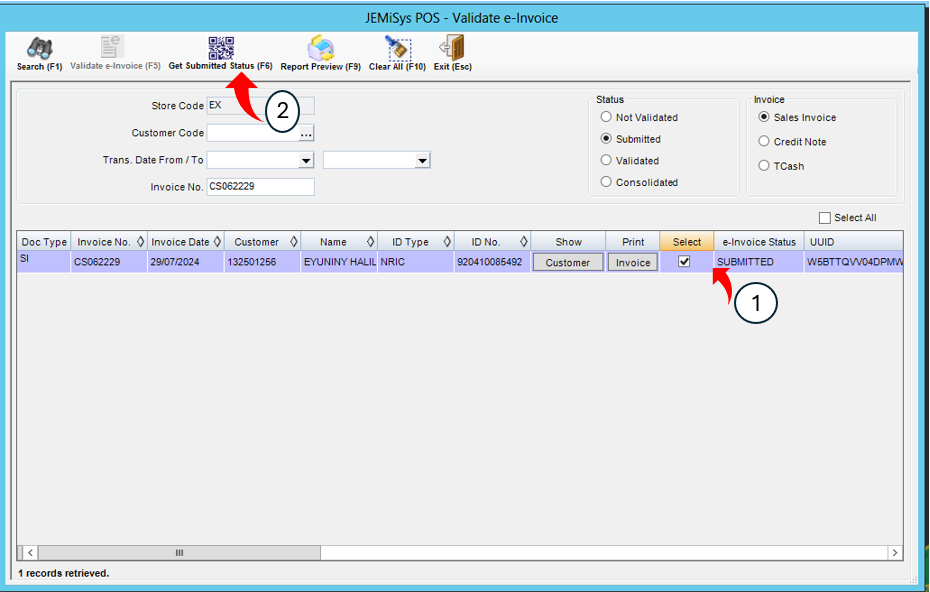
15.System will prompt to confirm get submitted status and Click Yes
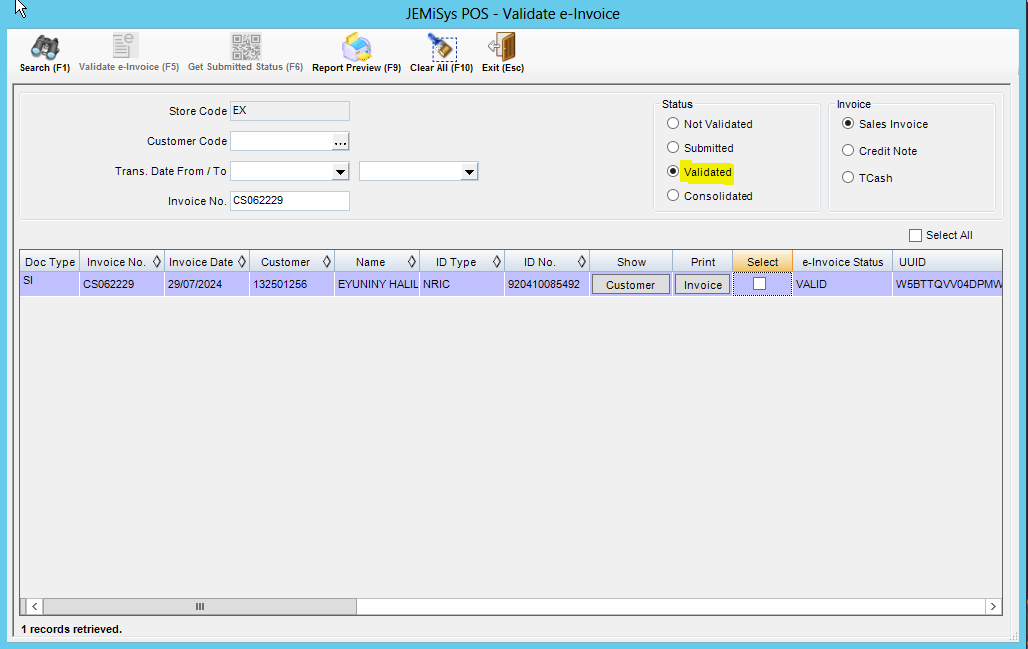
16.Once done, the invoice no. will automatically falls under Validated status
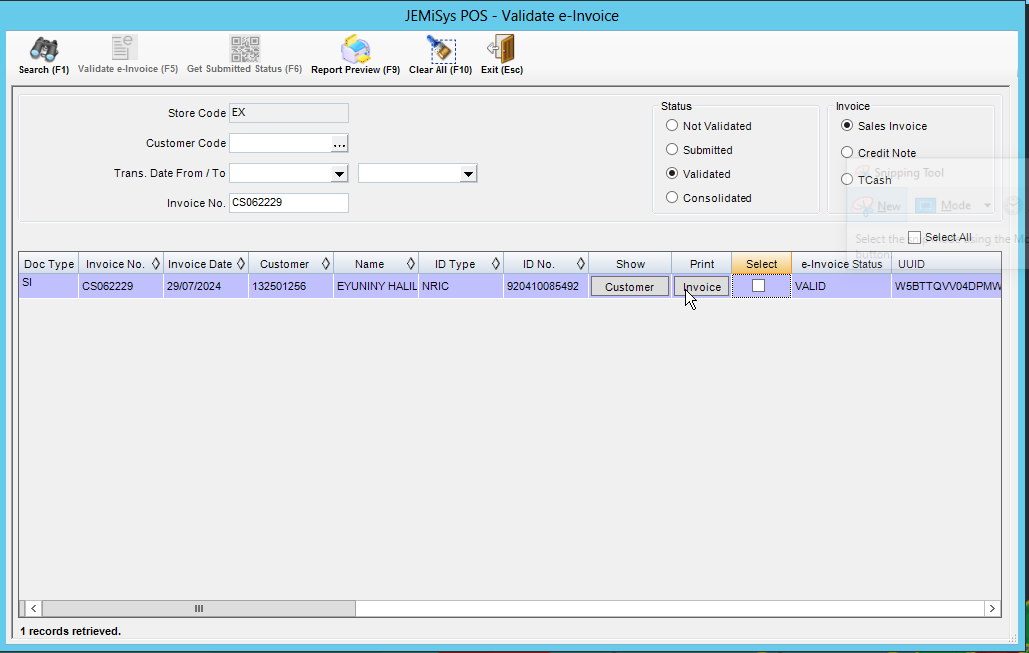
17.Click on Invoice button under Print column to preview the validated invoice.
18. Receipt will be having QR Code (contain LHDN link) for the customer to scan and see status e-Invoice validation from LHDN website
Sample of HABIB Receipt

Sample of PANDORA Receipt

E-Invoice Cancellation
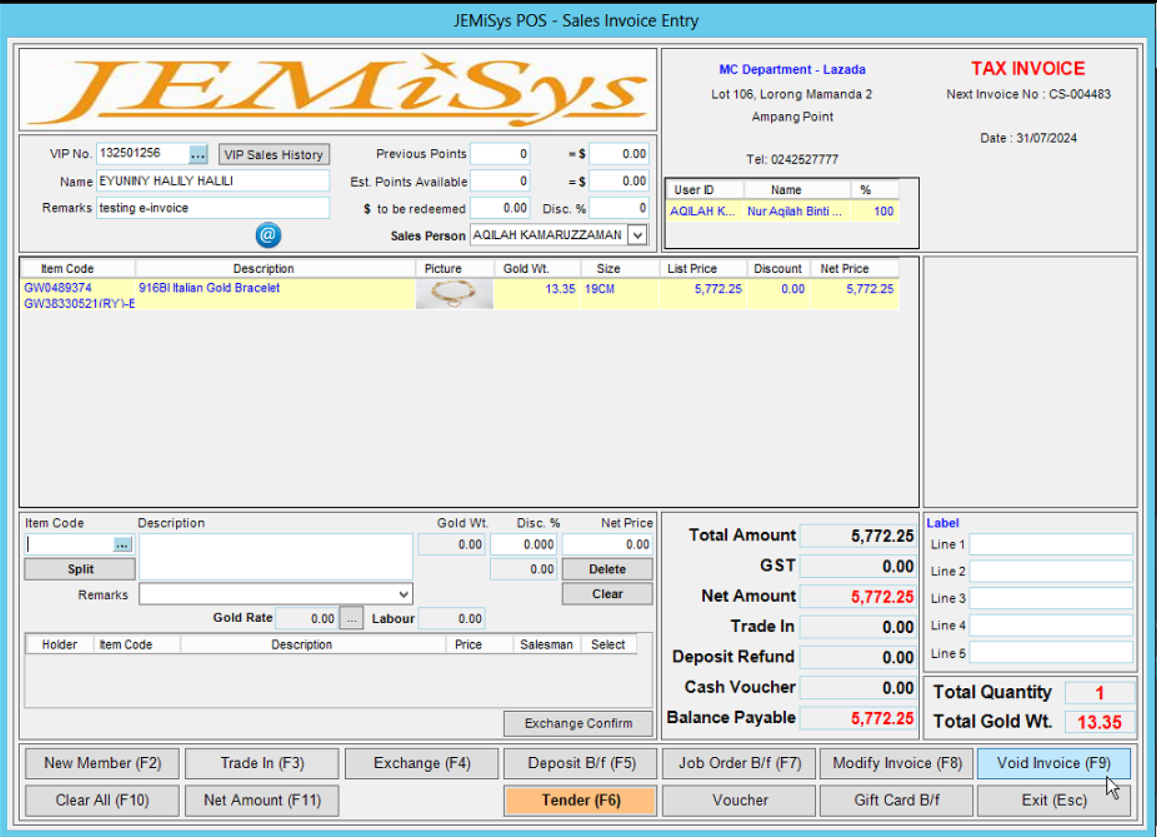
JEMiSysPOS – Void Sales (On Same Day Invoice Created)
- Go to the sales invoice entry screen

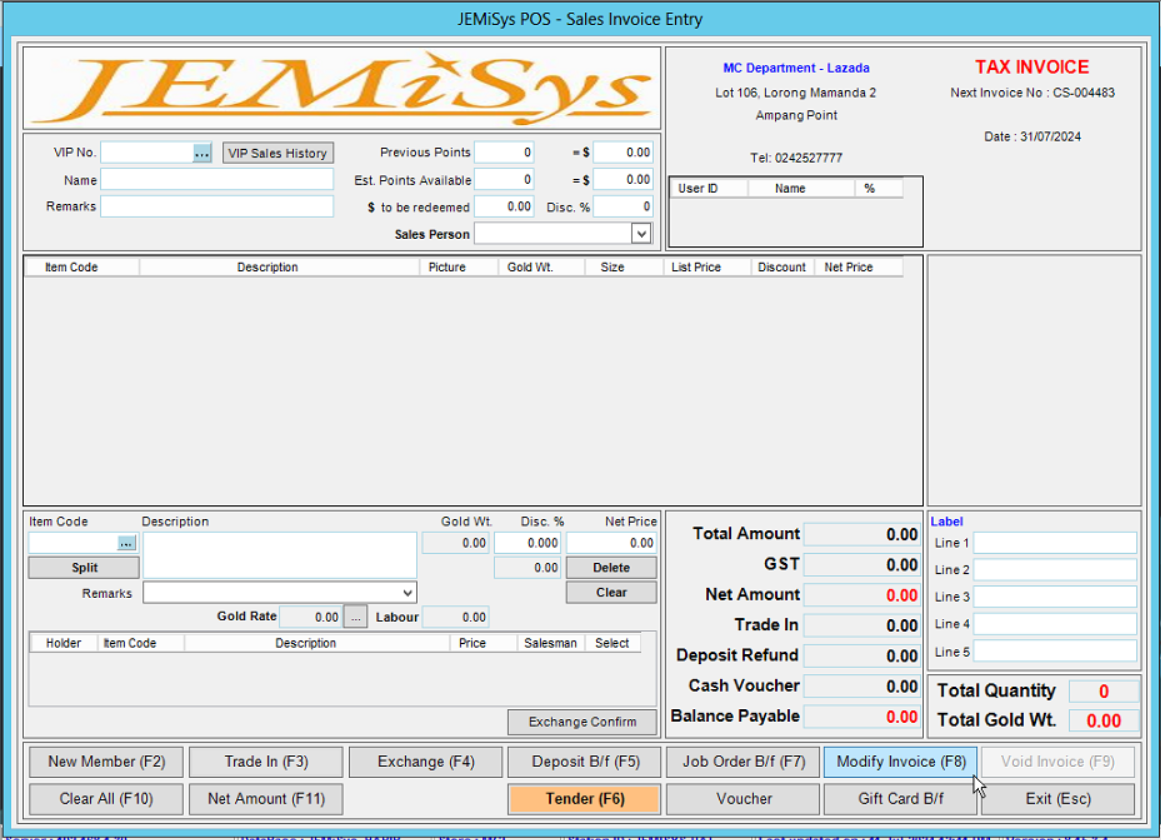
2.Click Modify Invoice button
3. Key-in the invoice no. and click Ok.

4. Once the previous sales invoice being called, Click Void Invoice button.
5. System will prompt message confirmation to void the invoice and user must input the Remarks.
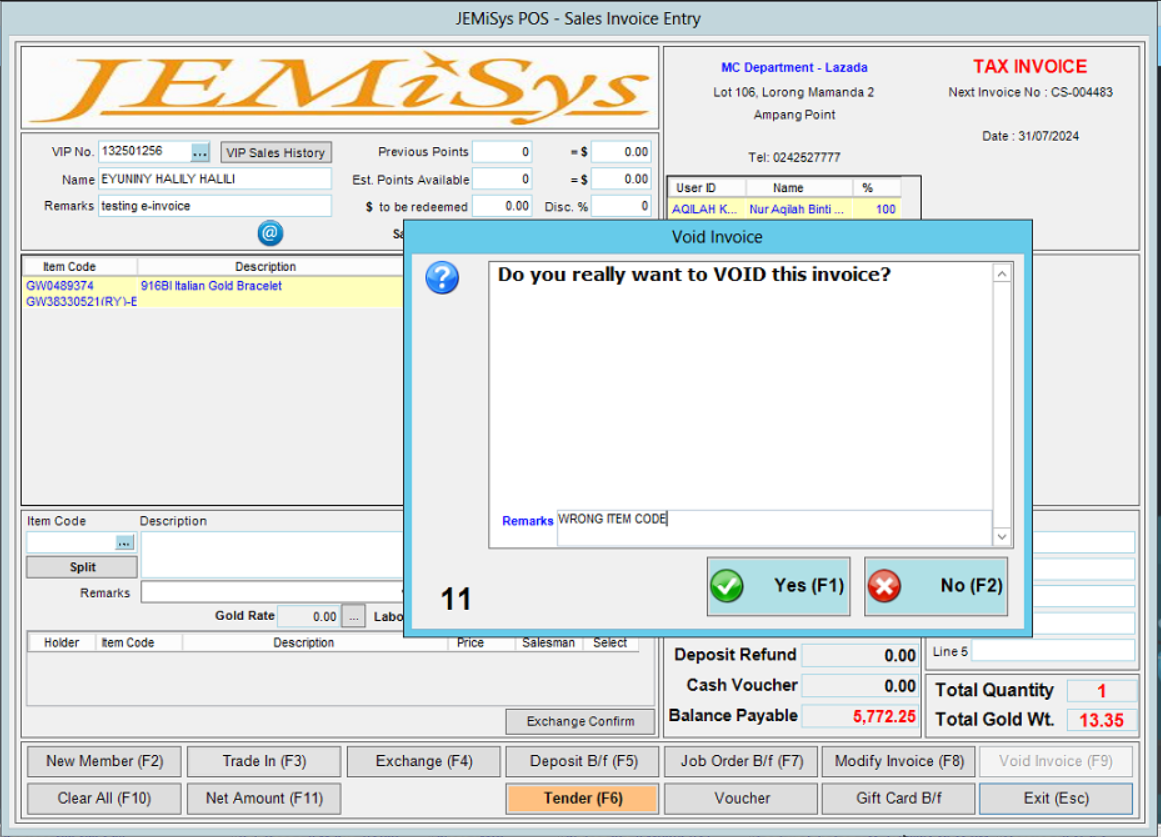
6. After Click Yes, system will prompt message ‘E-Invoice Cancelled Successfully’
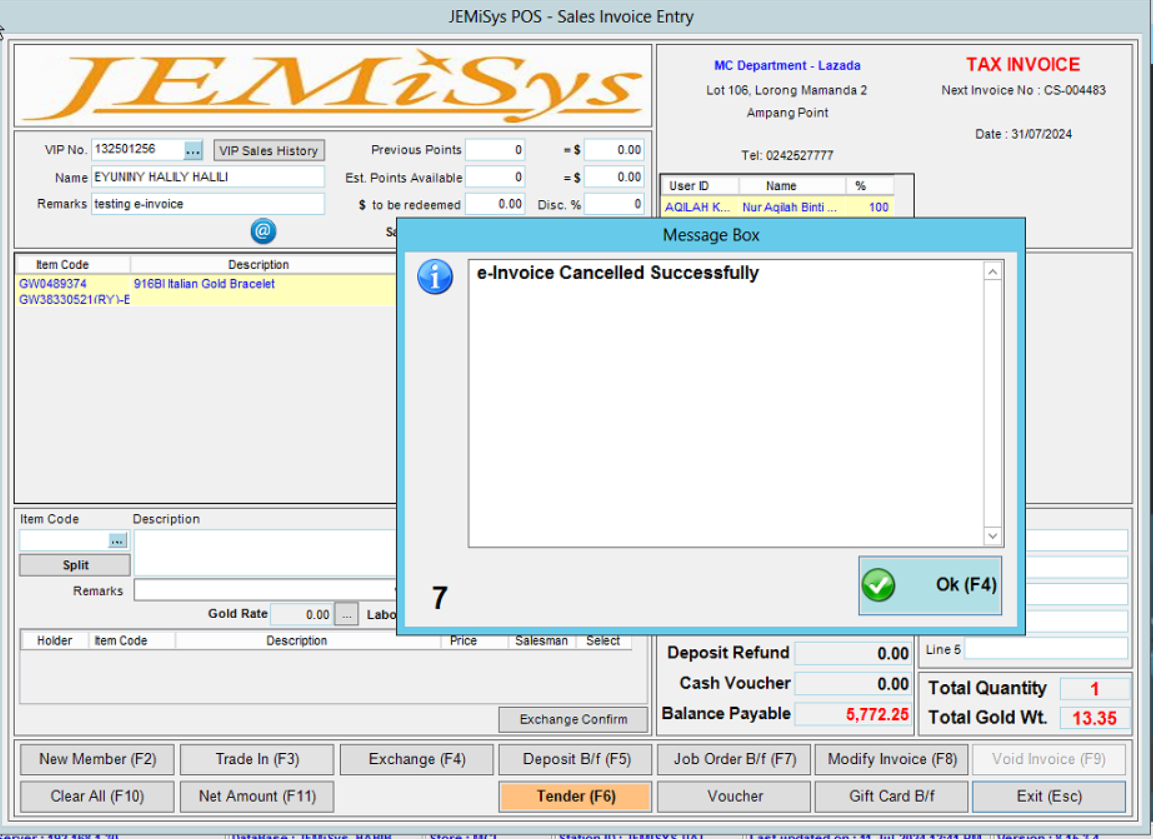
7. In validate e-Invoice screen, it will no longer appear Voided Invoice in Validated Screen.
8. From customer side, they will be receiving email notification from LHDN regarding the e-invoice cancellation.

JEMiSysPOS – Credit Note
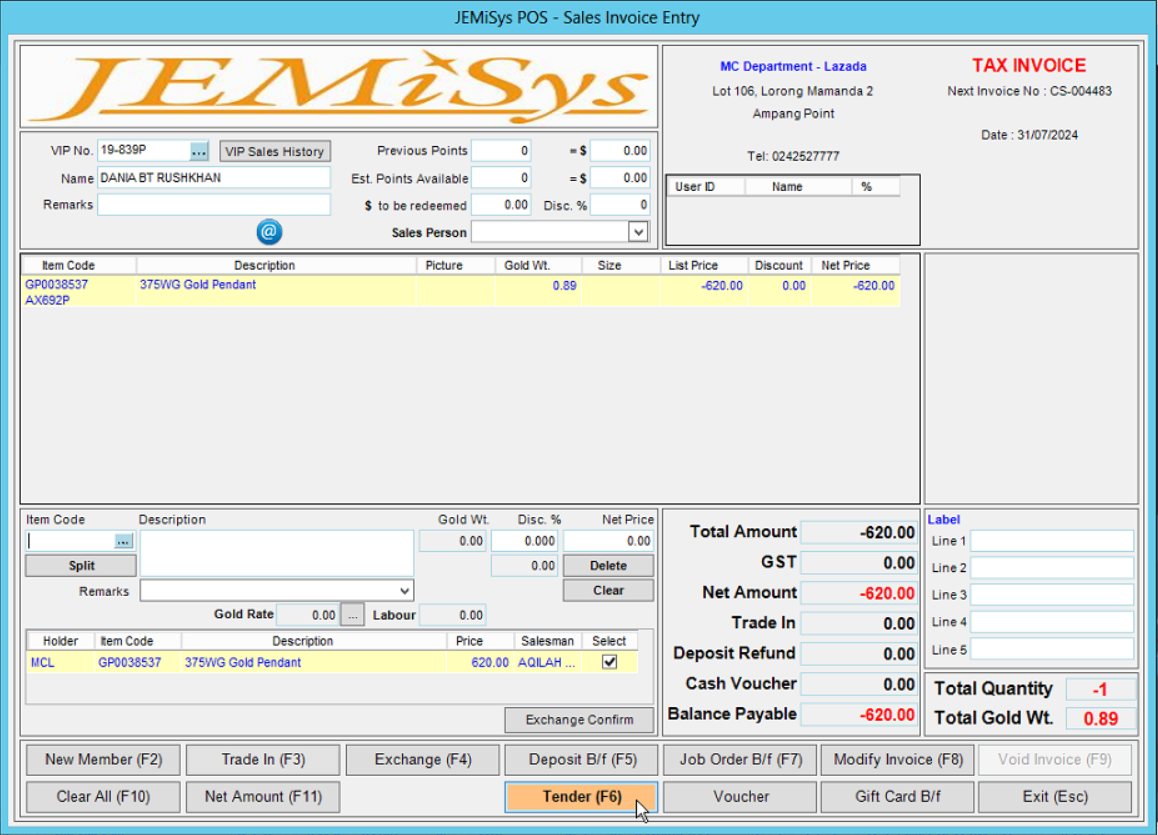
1. Go to Sales Invoice Entry function

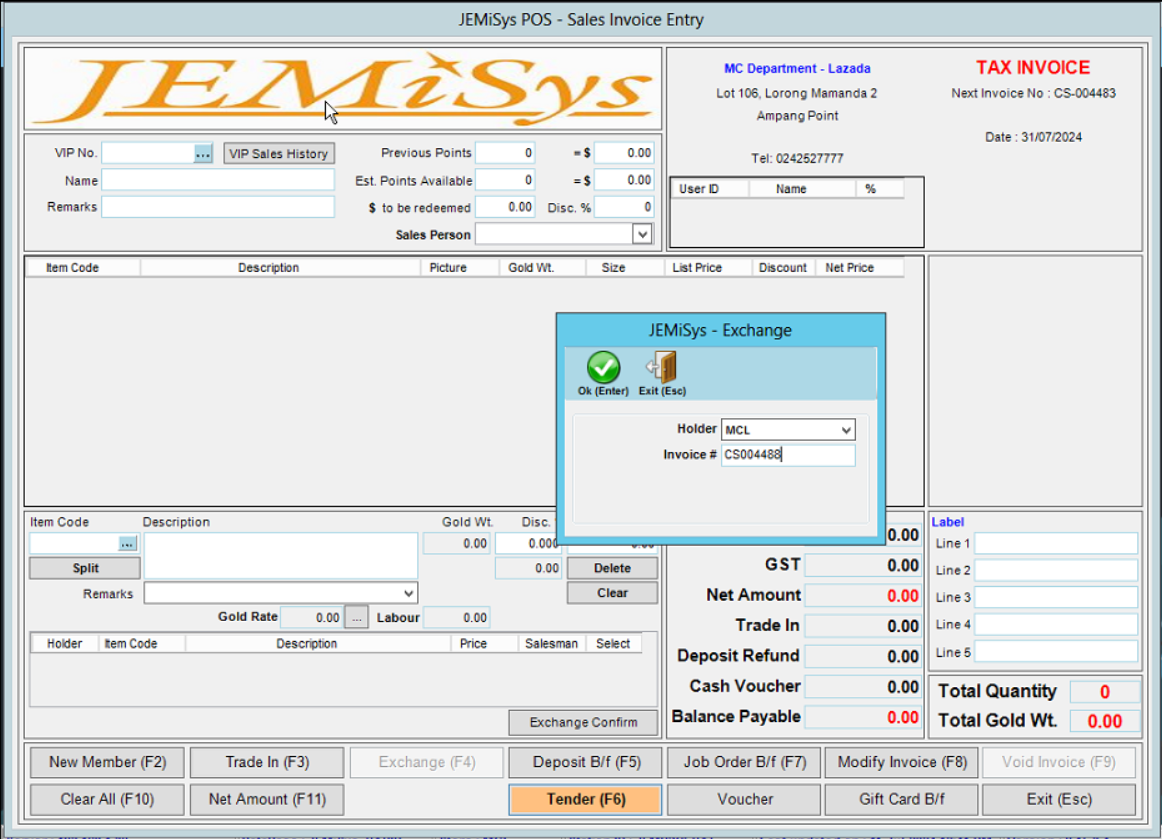
2. Click Exchange button

3.Key-in the sales invoice no.
4. Select item(s) to return

5. Click Exchange Confirm button. After Exchange Confirm button is clicked, price will be showing negative amount.

6. Click Tender button
7. In validate e-invoice screen, choose Invoice Type - Credit Note and Search the Invoice No.

8. Tick the Select box and click Validate e-Invoice
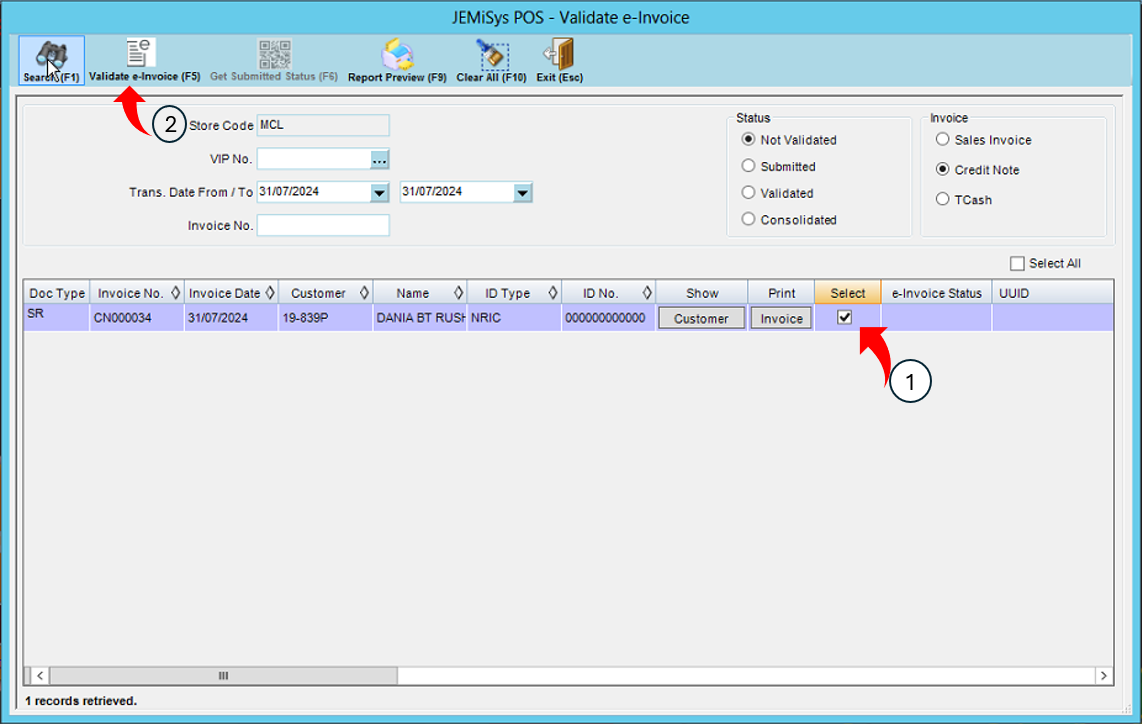
9. System prompt message E-Invoice has been submitted successfully and click OK.

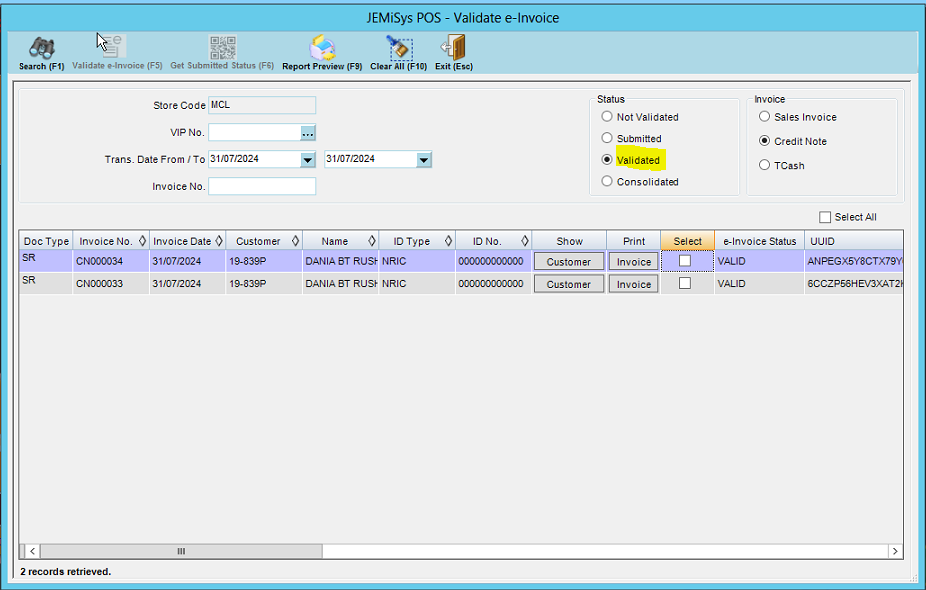
Credit Note no. will automatically falls under Validated status.
How to identify and troubleshoot if the system is down
- Sales Invoice/Credit Note stuck at ‘Submitted’ status even after click Validate e-Invoice
- No UUID appear after click Validate e-Invoice
Kindly contact MIS Department - Apps team for further assistance.